Sunday, April 30, 2017
glued the bailers in place
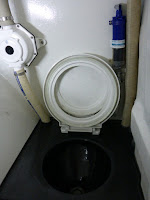
Yesterday I had no time left to place the pictures so I place them today. I started the morning with some sanding of the rudder bracket and them Fetske did come to assist me with gluing eye and the mast raise plates on the sides, I did not take pictures of both. We then Glued the bailers for the water ballast tank in place. I then made some plates on the tiller post to fit the tiller in between. We laminated the tiller tube yesterday and is made of PVC tube with carbon around it. In the afternoon after the F1 races I started with the trailer to drill some holes in it to mount some bars on it to fix the cradle on. I did a lot of other small things but the pictures speak for them self's


Friday, April 28, 2017
Laminated the remote tiller arms
I started with some sanding and cutting carbon for the arms. After laminating the arms I grinned the the back were I put some putty. In the afternoon I put a carbon filter for the toilet in place and mounted the compressor for the fridge with some bolts, this took some time because of the cramped space. As last job I cut a space for the bow pole, this pole can be rotated and is detachable. In the same hole there is coming a plate were the pulpit will be mounted on.

Thursday, April 27, 2017
Fitting the rudder bracket to the stern
Sunday, April 23, 2017
Trial fit of the outboard
Saturday, April 22, 2017
Last step of laminating the rudder bracket
Yesterday I sanded the bracket and cut all the necessary carbon piece to finish the rudder bracket.
In the afternoon we went to Thrill Seeker to put some anti-fouling on it but we did not have enough so today we finish it. This morning I laminated the bracket with the final pieces. When that is done we can cut some pieces out to mount it to the back and we than have make a arm for the remote tiller.
In the afternoon we went to Thrill Seeker to put some anti-fouling on it but we did not have enough so today we finish it. This morning I laminated the bracket with the final pieces. When that is done we can cut some pieces out to mount it to the back and we than have make a arm for the remote tiller.
Tuesday, April 18, 2017
Monday, April 17, 2017
Filled the front of the rudder bracket
We started with filling the front of the bracket with some foam and HD putty. We first put some layers carbon in the top section and we than glued in the middle section some foam. The top and bottom sections were filled with HD putty of aerosil and glass fiber snipers. Fetske did do the motor bracket with another layer of DD paint and I grained a piece of the porthole rime from the toilet away so it could fit. When I did take look at the rudder bracket I saw that the epoxy was getting to hot on the top part. After some cooling the rest was under control. I also cut the rudder post for under the traveler. After the lunch I drilled the holes for the motor start key and filled the edges with putty. I glued with the rest of the putty a glass fiber plate in place what will be used for mounting the water pump. We then went to Thrill Seeker to take a look what we had to do before we can get her to the water next week. The only thing we have to do is put some anti-fouling on her. We also measured how high it was on the trailer because I had the idea that our new trailer for Thriller was higher but in fact it is lower so I can fix the cradle to the trailer if the weather gets better. I forgot to take some picture so I went back to the shed to take some. and grinned some HD putty and foam away on the rudder bracket, the damages is not that big and I have to grind away some more.
Subscribe to:
Posts (Atom)